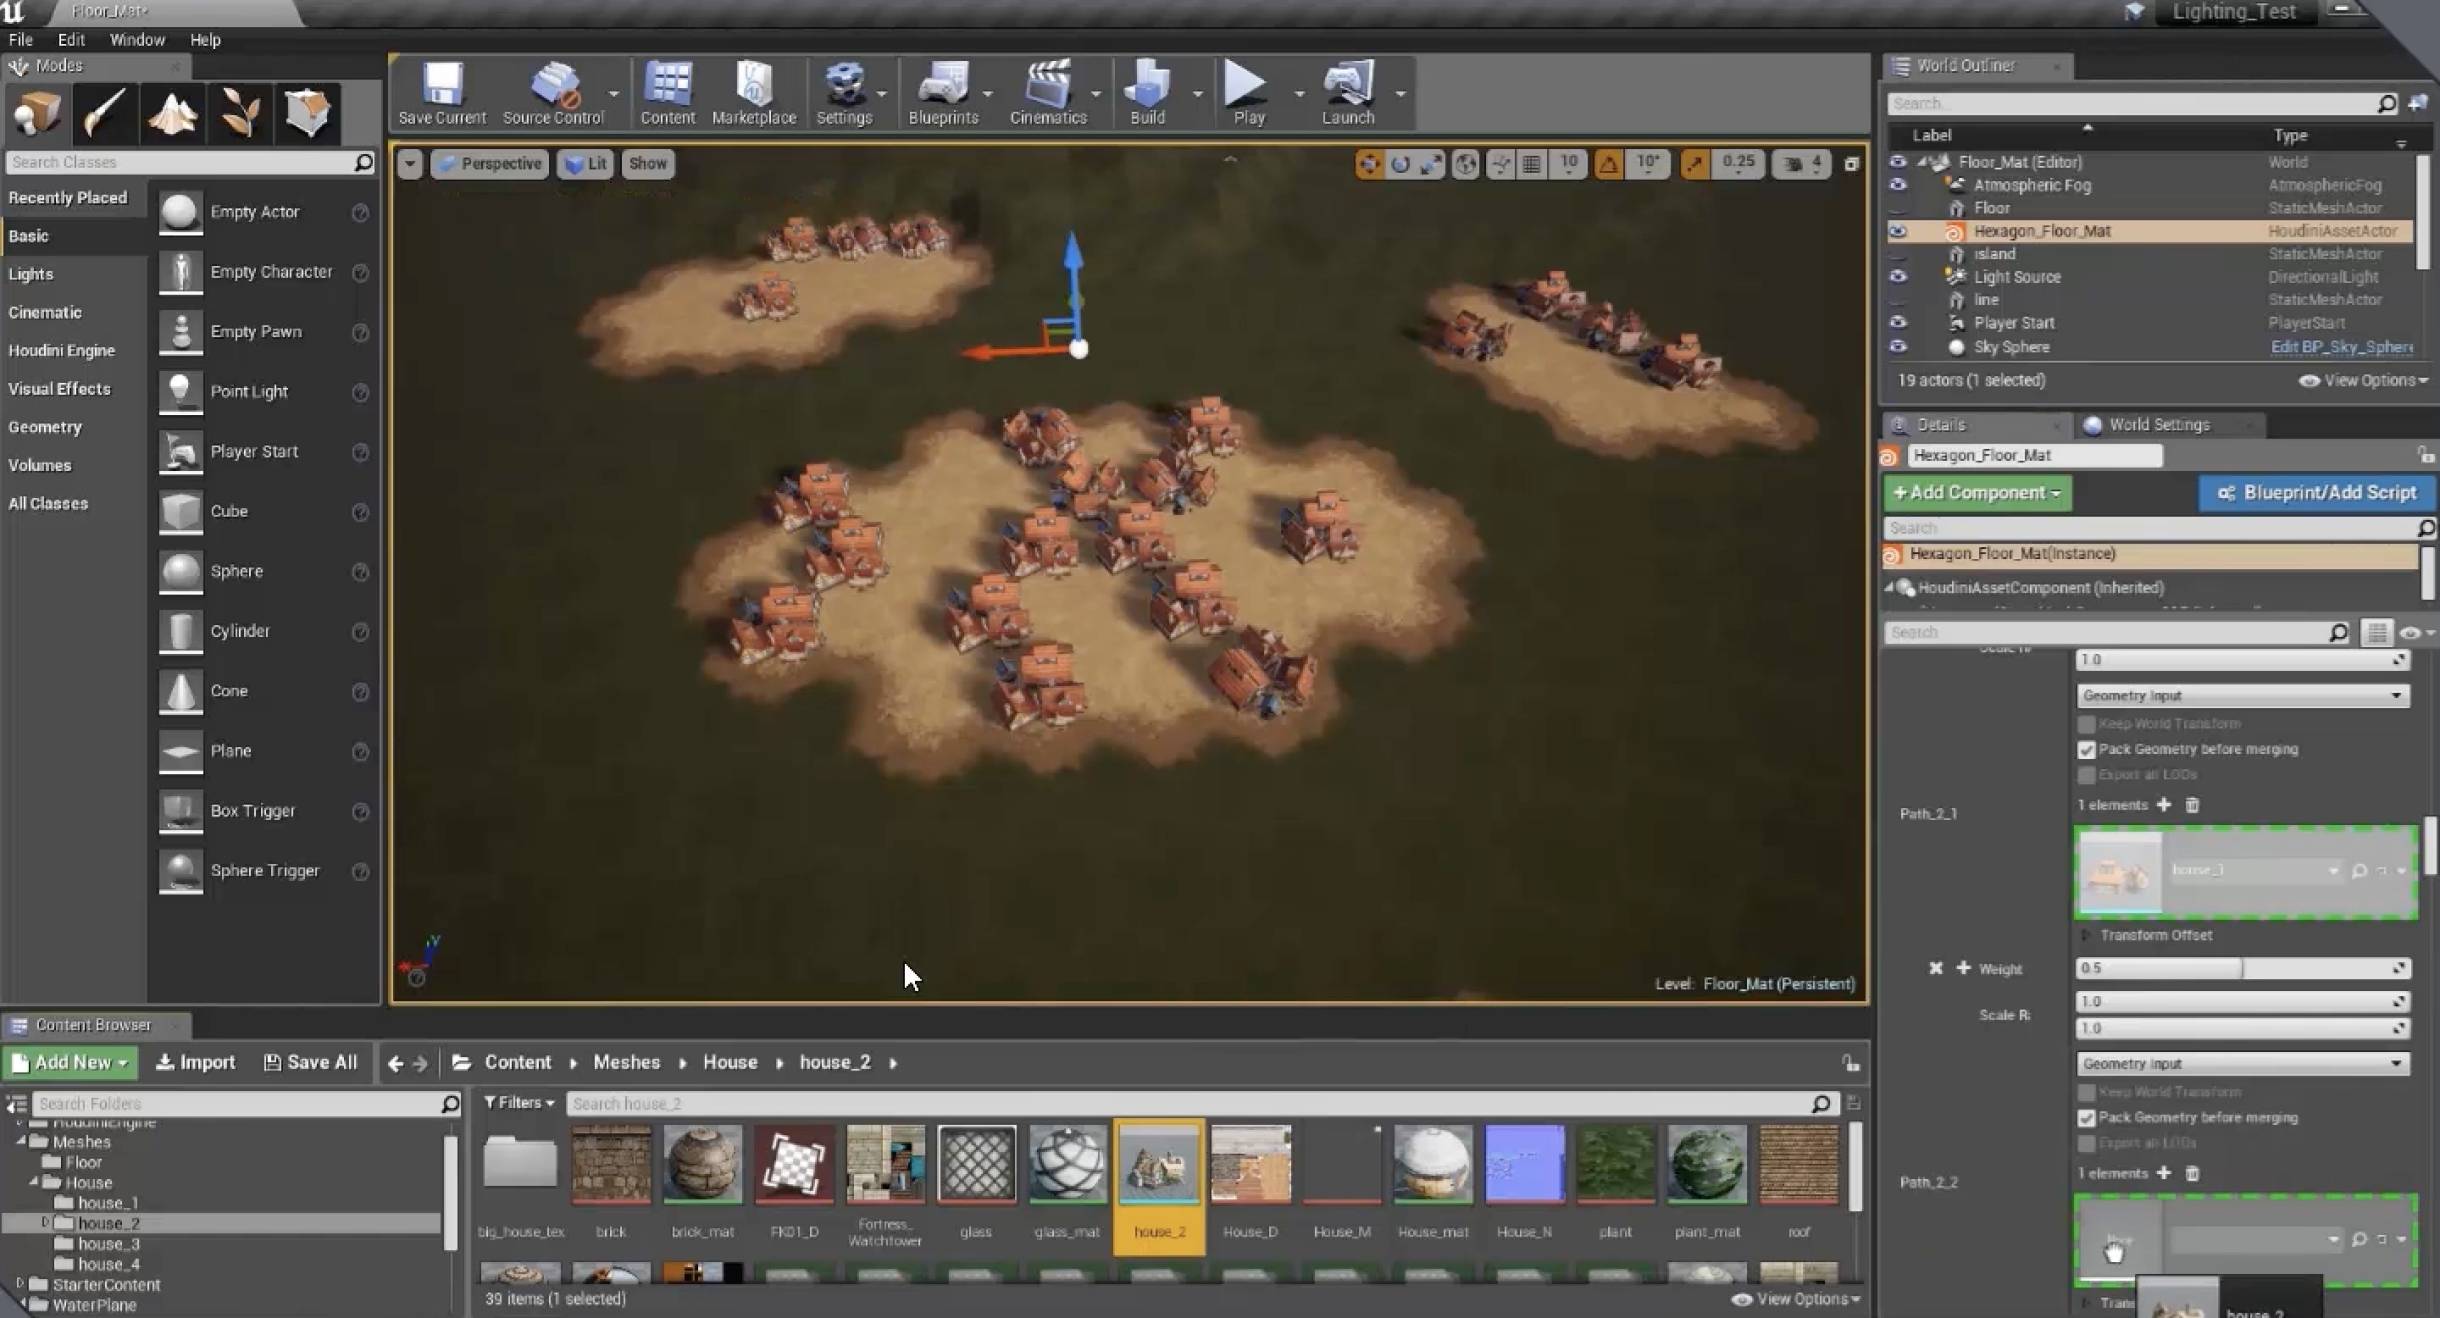
Development software interface
Files:
- Loading: A file could take longer to load than other files, it depends on the files size. The bigger the file, the longer it will take to load.
- Properties: are bits of data about the file that may be accessed using “properties”. In Microsoft Windows, for example, you may view a file’s properties by right-clicking the file name and choosing Properties.

- Merging: is the process of merging two or more groups of data in the form of a file or folder into a single file or folder.

- Replacing: switches the contents of a given file with those of a different file. It also produces a backup of the changed file.
- Importing: is to open a file in a format other than the one that the software generates on its own. An application user may normally just “Save” or “Close” the opened file after working with it, leaving it in the existing format, or convert it to another format.

- Saving: This feature is found on all software’s, it allows a user to save his data and come back to it as he left it when he saved it.
Viewports:
- Configuring viewports: There are multiple panels in the Viewport Configuration dialogue box, including Rendering Method, Layout, Safe Frames, Adaptive Degradation, Regions, and Statistics. The Preference Settings dialogue box also has a lot of options for altering the behavior and appearance of the viewports.

- Viewport controls: is a dual-slider control that allows you to specify the starting and ending positions of the viewport for scrolling effects.
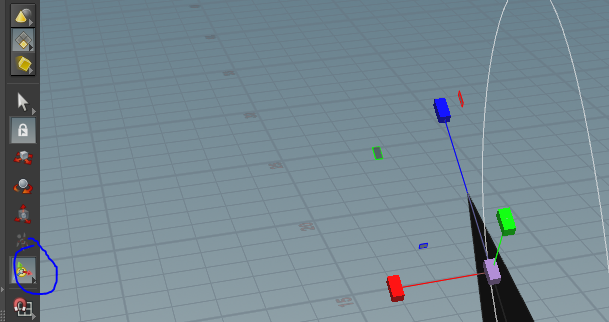
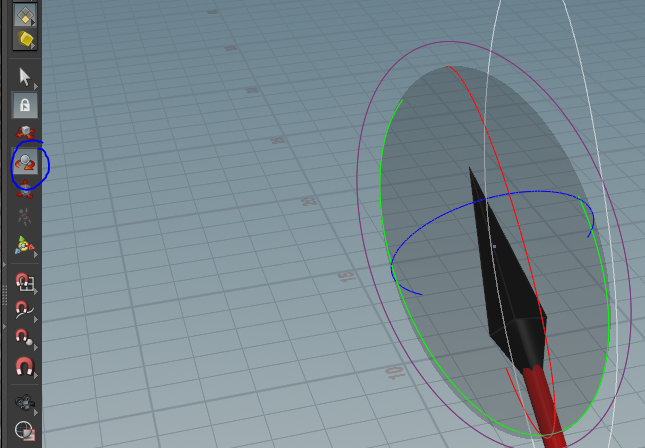
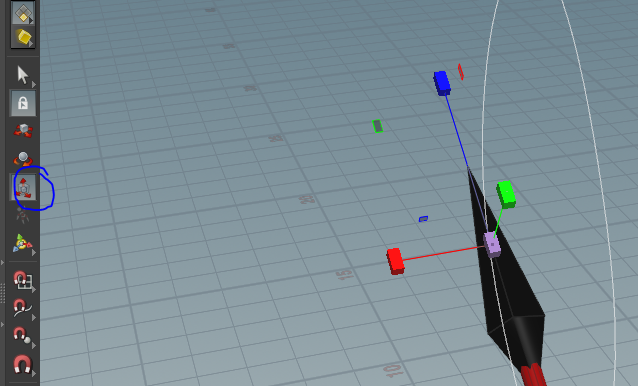
Command panels: consists of six user-interface panels that provide access to the majority of Houdini’s modelling tools, as well as certain animation functions, display options, and various utilities.

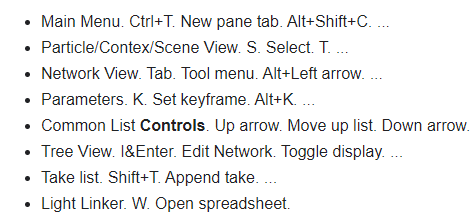
Keyboard shortcuts: is a sequence of one or more keys that instructs a software programmed to carry out a preprogrammed action. For example, “Esc” allows you to view the area, “E” allows you to scale the certain object, “R” allows you to rotate and so on.
Floating Palettes: This is particularly beneficial if you have many displays. On a different monitor from the primary window, you can retain a second window with helpful panes. Pane tabs may be dragged and dropped between panels as well as between a panel and the main Houdini window.

Customising the interface: allows users to personalise their online experience by customizing the user interface to their preferences.

Floating toolbars: is a toolbar that can be moved around the screen, as opposed to a typical toolbar that is fixed in one location.

Drawing Units: The units are divided into four categories: length, angle, insertion scale, and lighting. The units are used to represent the dimensions.

Drawing aids: are important data entry modes and procedures that, if learned, allow you to make measured drawings with ease.
- Layers: Layers can minimise a drawing’s visual complexity and increase display efficiency by hiding information that you don’t need to view right now. Nodes have a blue option that if its turned off it will hide that specific node and if turned on it will show the specific node.

- Grids: is a regular pattern of dots displayed on the screen that serves as a visual aid; it is comparable to working on a drawing board with a piece of graph paper behind you. You may adjust the grid spacing to get an approximate idea of the size of created objects.

- Snap: allows you to choose points on a normal grid. The Snap grid is entirely separate from the display grid. To minimise misunderstanding, the Grid spacing and Snap spacing are normally set to the same value.

Object naming conventions: is a rule to follow when naming objects like as a Job, file, context, variable, and so on. Conforming objects are easily identifiable and aid in determining their purpose.

Geometric models and text
Models:
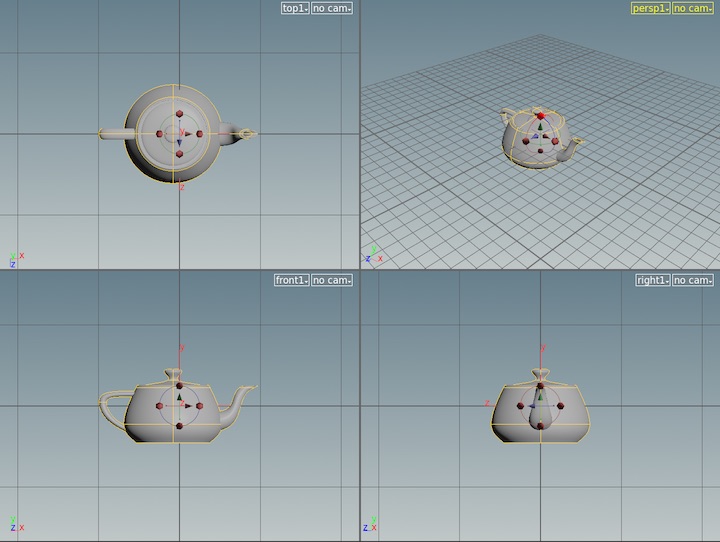
- Box: I haven’t used a box for my project. However, you could easily click the “box tool” on the create tab and place it into the scene view. The box has 8 vertices, 10 edges and 6 faces. All of these are customisable.

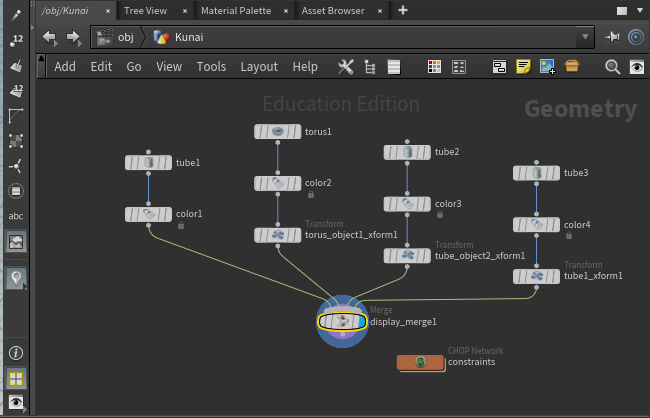
- Tube: I have four “geometry nodes” and three of them are tubes. But, I’ve changed two of the tubes physical aspect to a cone/pyramid. As I couldn’t find a geometry node that was a cone/pyramid. A tube has 1 face, 2 edges and 0 vertices.

- Plane: I haven’t used a plane for my project. It has 1 face and 1 vertices.
- Sphere: I haven’t used a sphere in my project, however I could easily add a sphere by clicking on the create tab and dragging in a sphere. A sphere has 0 faces, 0 edges and 0 vertices.

- Disc: I haven’t used a disc for my project. There isn’t a default disc which you could drag from the create tab. So you’ll have to get a torus and scale it until it is flattened and looks like a disc.
- Cone: I’ve used this object for my project, however as I explained above there isn’t a default object for a cone. So I grabbed a tube and changed its shape until it looked like a cone/pyramid. Which I managed to do.

- Cylinder: There isn’t a cylinder object node in Houdini, but the closest object to it is a tube. All you have to do is fill in the sides of the tube to make it look like a cylinder. A cylinder has 3 faces, 2 edges and 0 vertices.

- Pyramid: Again, there isn’t a default pyramid object on the create tab, so you’ll have to take a tube and and change its physical aspect and scale it, until it looks like a pyramid. Which I have done. Pyramids are made up of 5 faces, 5 vertices and 8 edges.

3D Text: To make a 3D text you must click the “font” tool on the create tab. Place it into the scene view, after
Press ⌃ Ctrl + ![]() on the
on the
Then you can choose different font types, change the size from the drop down menu and obviously change the text.

Mesh building and editing
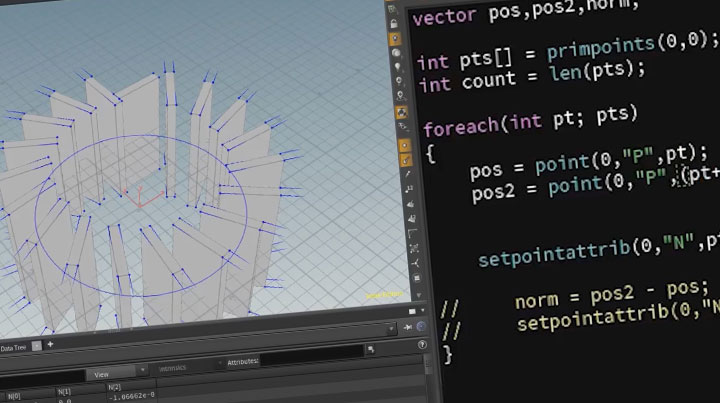
Vertices: are polygonal in form. So a box’s corner would have three verticals and one point. The vertex sop allows you to manage them.
- Adding: To add a vertex wherever your cursor is, simply hold Ctrl and push the right mouse button. Hold down Ctrl and hit the right mouse button again to create a new edge between this vertex and a chosen one.

- Editing: On the Editor toolbar, select the Edit tool and then the feature. Then, in the Editor toolbar, just double-click the edge with the Edit tool.

- Deleting: You could either click on the vertices and then press the “DEL” button. Or you could select the vertices and choose “edit mesh”, then “delete edge/vertex”.
Polygons:
- Planar: A polygon face is planar when all of the vertices of a polygon face are in the same plane, it is said to be planar. A triangular face, for example, is always planar since its three points form a plane.

- Non-planar: A polygon is non-planar when it contains more than three vertices and one or more of those vertices are not in the same plane Non-planar polygon faces are available when a polygon mesh is made up of quads.
Modelling
Layers:
- Modify: The Modify tab’s tools allow you to effortlessly alter objects in the scene view. For example, I used the combine tool within the modify tab, so that I could merge all my objects together. I struggled at first doing this as I couldn’t find the combine tool.

- Move: Press “T” as a shortcut button to move the objects around which are in the scene.
- Rotate: Press “R” in order to rotate the objects around. Or you could press on a object and on the right hand side there will be a transform tab where you could rotate the chosen object.
- Stretch: Select the point to stretch, then click the squash and stretch tool on the deform tab. Choose an axis as the primary axis in the drop down menu on the parameter editor. Then control the amount of squashing and stretching by adjusting the Strength and Rolloff settings.
- Deform: To deform objects you must select the deforming geometry to convert to a collision object. On the Rigid Bodies menu, select the Deforming Object tool, and there you go.
Extend:
- Bevel: The tool in a boolean-type bevel first cuts out the portions of the surface near to the specified corners, then fills in the empty area with new surfaces. Instead, this is a bevel made entirely of polygons. It uses the current topology to generate fillet polygons that match to existing edges.

- Extrude: Poly Extrude allows you to “pull” faces and edges out to generate additional polygon columns/sheets. You can specify the number of extrusion divisions and the extrusion curve from the origin to destination.

- Lathe: A lathed object is a three-dimensional model whose vertex geometry is generated by rotating the points of a curve set around a given axis. Lathing may be partial; the amount of rotation is not always a complete 360 degrees.

Combine:
- Boolean: it combines two polygonal objects or determines the intersecting lines between two polygonal objects. The boolean tool is found in the model tab.

- Patch: Creates a patch of triangles that is evenly divided. Patch types enable for precise definition of boundary point counts, allowing for routine stitching.

Duplicate:
- Mirror: The Mirror tool at the Scene level makes new mirror duplicates of the selected objects. You may utilise the controls in the operation controls toolbar (at the top of the viewer) to have the objects renamed automatically when you duplicate them.

- Array: creates an array of duplicates of the base object, with each duplicate offset from the preceding one in one of many ways. Vertices in neighbouring copies can be blended if they are close together, enabling for the creation of smooth Subdivision Surface frameworks.
- Clone: The tool creates a Duplicate (clone) surface node at the Geometry level, which copies the selected geometry and places the result in a single geometry object.
2019-01-2719-18-24.png.6613c1308182d9f7896250c4cb58d399.png)
Organic modelling:
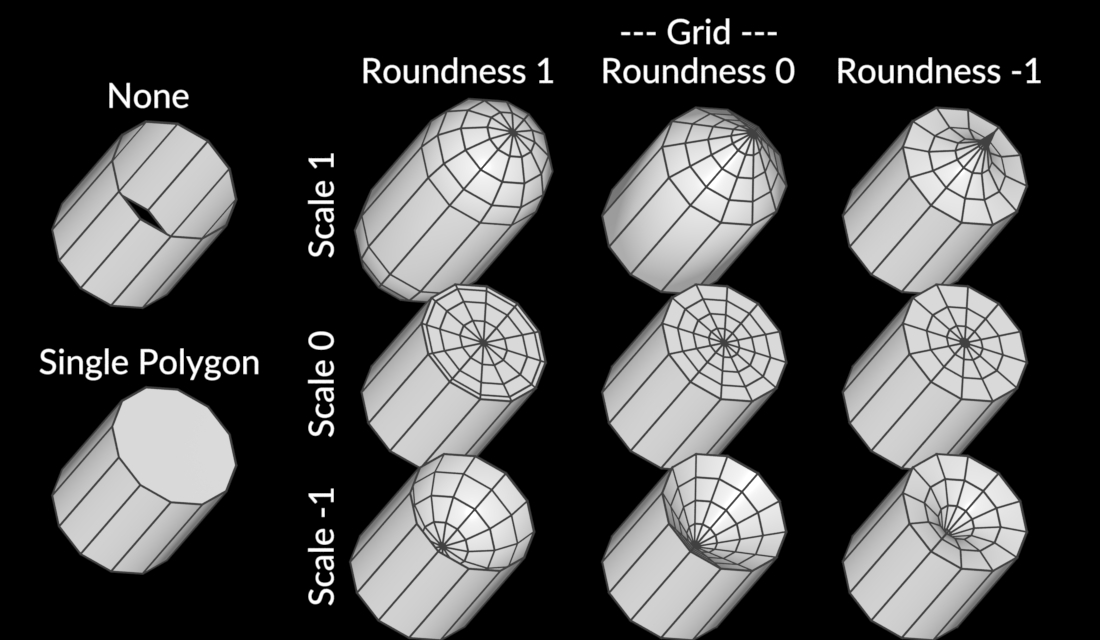
- Sub-division surfaces: At display or render time, subdivision smoothes and provides more resolution to curves and surfaces. The surface is subdivided by the renderer until it is smooth down to the pixel level. At the object level, you may enable display subdivion and render subdivision individually.

- Weight maps: Weight maps are point cluster features of geometric objects. They assign a weight value to each point in a cluster. When you create a weight map, the base map is set by a WeightMapOp operator, which might be constant or one of many gradients.
- Level of detail: is the level of complexity in a 3D model representation LOD can be reduced when the model moves away from the viewer or based on other factors such as object importance.

Nurbs:
- Relational modelling: It’s a mathematical model that represents curves and surfaces with basis splines (B-splines). It’s best for models that require a high level of precision.
- Curves: To use curves you must click the “curve” shelf option on the create tab, after select NURBS from the type menu on the operation control toolbar. Move the mouse into the scene view and click to place the points, when happy with your work press enter to finish the curve.
- Control vertices: is a point connection. Vertices are used by primitives to points of reference. For example, the corners of a polygon, the centre of a sphere, or a spline curve’s control vertex.

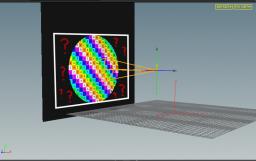
- UV Coordinates: UV Texture adds texture UV coordinates to the source geometry for use in texture and bump mapping. To use UV texture, you must select the primitives to compute textures UVs for. Then click the UV texture tool on the texture tab.

- Surfaces: A NURBS surface is made up of a collection of curves. Each NURBS surface is defined by a specific parametric equation and is always a four-sided patch.
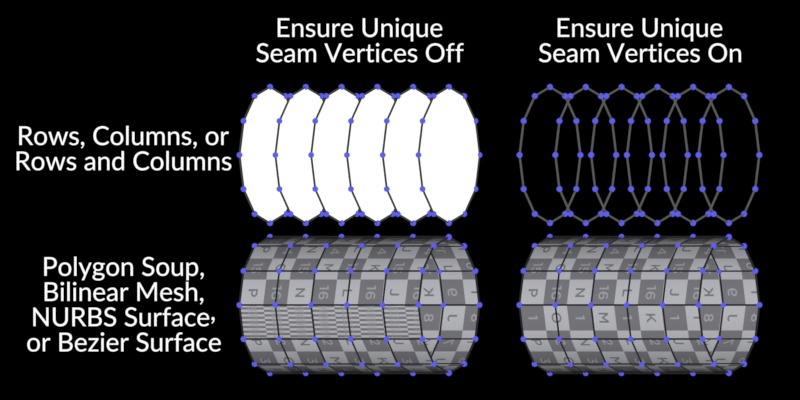
![NURBS Surfaces Concepts [McNeel Wiki]](https://wiki.mcneel.com/_media/legacy/en/w_uvsrf.png)
- Extrudes: Extrude, by default, determines the direction of extrusion based on the surface’s normal. In the case of planar or open polygons, determining the normal is hard and may not always produce the desired outcome.

- Surfaces: A NURBS surface is made up of a collection of curves. Each NURBS surface is defined by a specific parametric equation and is always a four-sided patch.

- Sweeps: This node takes a cross-section curve from the second input, duplicates it along a spine curve from the first input, and then produces a surface between the scattered cross-section curves. This node accepts polylines and NURBS curves. The kind of surface is determined by the kind of input curves by default (for example, NURBS curves produce NURBS surfaces).
- Skinning: is a Houdini Digital Asset (HDA) capable of converting any non-changing topology deforming mesh sequence into a bone-based animation. The user has control over a few settings, allowing them to get their desired result.

- Trims: Curves on surfaces are supported by Houdini (also known as trim curves and profile curves). Profile curves are two-dimensional curves that exist in the parametric (UV) space of their parent surface. Houdini creates profile curves on the surface as dotted lines.
- Fillets: Filleting generates a new primitive between each pair of inputs and has no effect on the original forms. This is opposed to Join and Stitch. The Join SOP transforms and potentially modifies the joined ends of primitives, whereas stitching modifies the original forms but does not modify the number of generated primitives.
- Surface approximation: Any sort of surface can be used as an input. The Fit op only considers the primitives’ control vertices (CVs), considering the CVs as data points to run the fit across. Because the Spline bases of the input NURBS surface are disregarded, a cubic NURBS surface and a mesh with the same number of rows and columns and identical points will provide an equal fit.

Virtual Camera
Concepts:
- Lens Length: Diverging lenses or positioning an object inside the focal length of a converging lens produce virtual images. For the case of a virtual picture, the ray-tracing operation is repeated.

- Field of vision (FOV): is the size of the observable world that can be observed at any particular time. You can make the FOV bigger by using the scroll wheel on your mouse. That will allow you to look at a wider FOV.
- Focus and aperture: The focal distance of the lens and the distance from the camera at which objects will be in focus. Objects beyond this distance will be blurred if the fstop channel is also active.
- Depth of field: Depth of field may be enabled by checking the Enable Depth of Field box on the Sampling sub-tab of the Properties tab in the parameter editor of a render node. Depth of field is controlled by four factors. The Focal Length parameter is found on the camera node’s View tab. The camera node’s Sampling tab contains the Focus Distance, F-Stop, and Bokeh parameters.

Cameras:
- Creating a camera: To create a camera you must hold “Ctrl” and click camera or a light to create a camera using the current view.

- Creating a camera view: You create a camera like I’ve said above, and then you change the view of the camera by pressing space + left click to tumble it, or space bar + Ctrl + left click to tilt it. And there are other options too.

Camera parameters: Camera parameters are the parameters used in a camera model to define the mathematical relationship between the 3D coordinates of a point in the scene where light is coming from and the 2D coordinates of its projection onto the image plane.

Camera Type:
- Target: In only a few clicks, you can create complex smooth camera movement. Simply place any number of Nulls in your scene and use one parameter to shift your camera between them. Nulls have the ability to be animated or parented to other objects.

- Free: Free cam allows you to freely move around the scene, from any angles.

Conversion from real world equivalents: assures that when a consumer buys your model, they can utilise it right away and without scaling problems. It’s assumed that your model can be dropped into a scene and scaled down with minimal work.

Lighting
Light types:
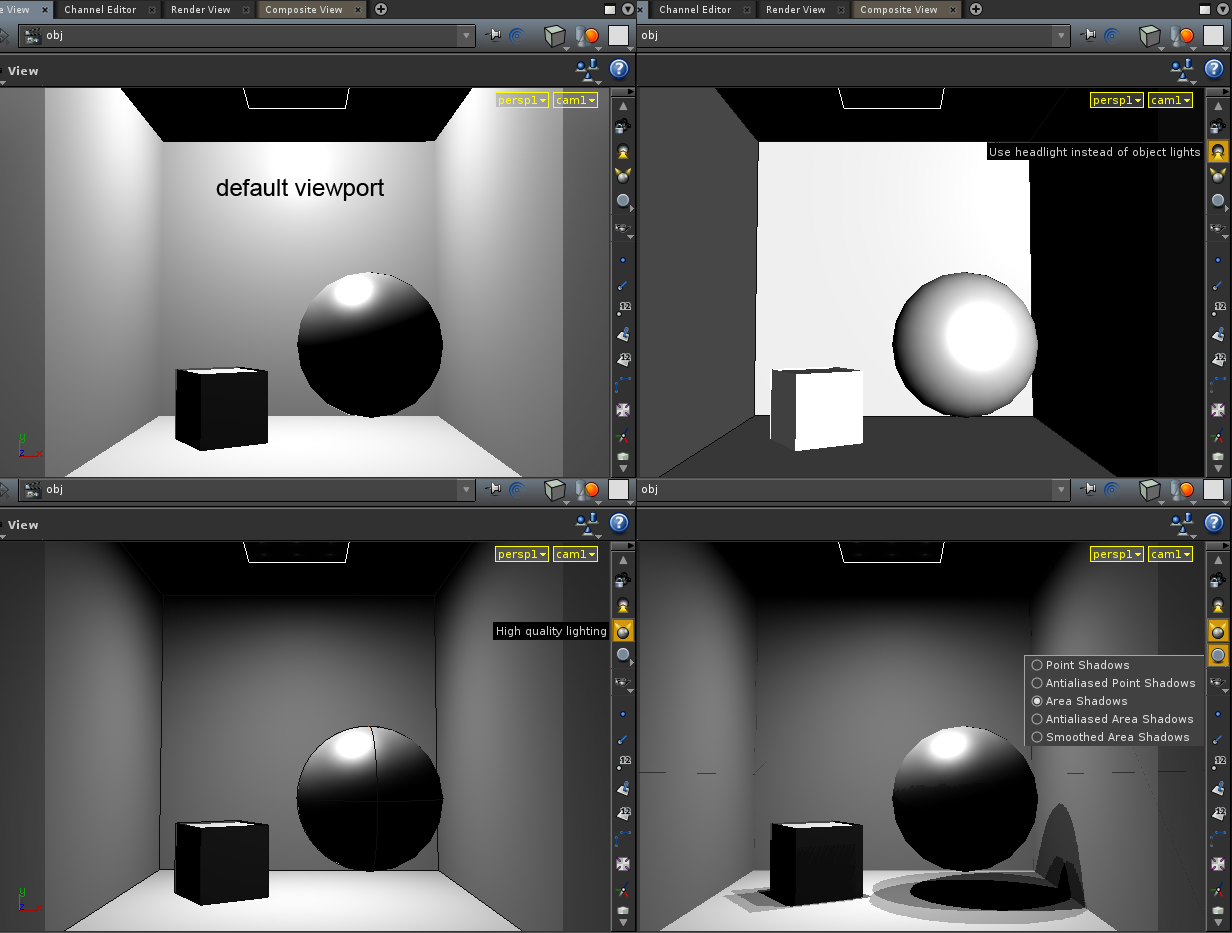
- Ambient: Adds a consistent level of light to all surfaces in the scene from every direction. Object parameters are often used. Nodes that represent objects. Object nodes represent scene objects such as character parts, geometry objects, lights, and cameras.
- Distant: Creates or modifies a USD Distant Light, which represents a distant light source such as the sun. Adds several useful Karma-specific features.

- Area: This tool creates a Light object with the Light type parameter set to “Grid.” You may vary the form of the area light by altering the Light type parameter. Set the size of the light using the Area size parameter.
- Spot: Similar to a light bulb, it emits light from a single point in all directions. Spot Lighting is a cone-shaped beam of light which is emitted from a point in a certain direction.

- Point: Point lighting emits light towards a specific object (pointing towards it).

- Linear: Working with “linear colour” refers to lighting and rendering in a colour space where the mapping between numeric colour values and “absolute colour” is a straight line. All internal colour calculations in Houdini are done in a linear colour space.

- Photometric: Photometric lights rely on data collected from real-world lights, which are frequently obtained directly from bulb and enclosure manufacturers. IES profiles from companies such as Philips can be imported; their IES files provide exact intensity and spread data for a specific light model.

- Raytraced: is a rendering approach that generates images by tracing the course of light as pixels on an image plane and modelling the effects of its interactions with virtual objects.
Lighting controls and effects:
- Projector: is a light that casts an image or a noise-based pattern onto geometry. This is useful for making genuine projectors.
- Attenuation: Controls how light intensity drops as you move away from the light source.

- Colour: The amount of light has an impact on the value and intensity of a colour. Colours appear darker and less vibrant in dim light. The value lightens and the intensity rises as the amount of light increases, until you achieve the genuine colour.

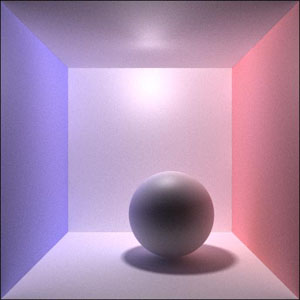
- Shadows: Physically based rendering (PBR) depicts light bouncing about a scene in a realistic manner. Shadows are rendered “automatically” since it only illuminates surfaces that are struck by bouncing light.
Atmospheric:
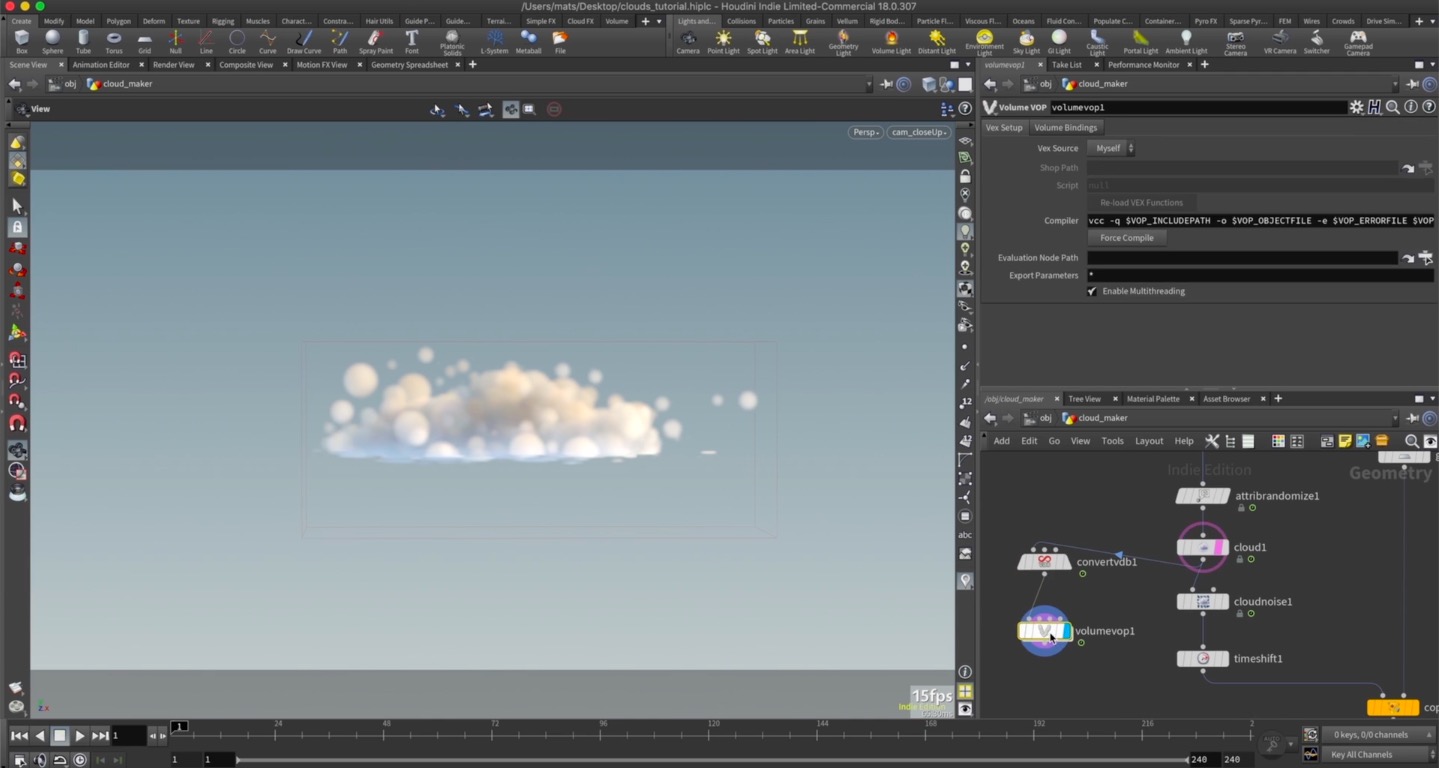
- Clouds: This node generates a volume representation from an existing polygon or point cloud source geometry. It may optionally generate extra secondary elements to provide the look of a cloud.
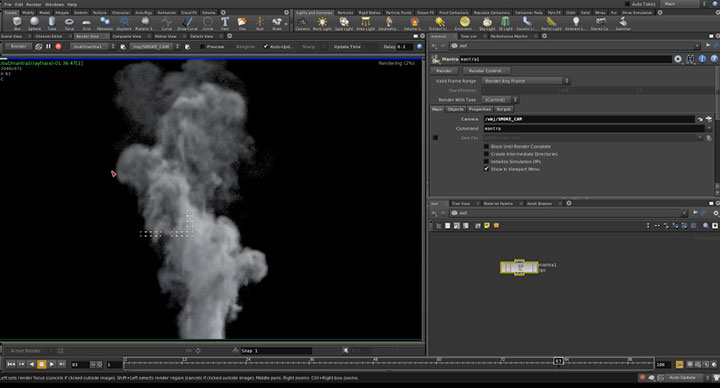
- Smoke: The Pyro solver handles hot expanding gas effects such as smoke. The Pyro FX shelf tab has tools for producing various effects. The source geometry is used to produce effects.
- Fire: The Pyro solver handles effects such as fire that are caused by hot expanding gases. The Pyro FX shelf tab has tools for producing various effects. The source geometry is used to produce effects.
Volumetric:
- Fog: This operator adds atmospheric effects to an image, such as fog, haze, and heat waves. A plane containing the fog’s depth is needed, often depth (Pz) or a point plane (P). Normal fog, additive fog, haze, and heat waves are the four fog effects.

- Mist: Based on an underlying FLIP fluid simulation, the Mist shelf tool produces mist particles into a one-way smoke simulation. It is finer than Whitewater and has the appearance of smoke because the particles (vaporised water) are blown around by the air.

Texturing
Creating Textures: To create textures you must go to “filters” -> “Render” -> “Clouds” (use default settings). After, go to the render menu choose “Mplay” then Local disk files. Under the files format choose random access texture and save the file as a .rat file.

Loading: The heavier the file the longer it will take to load that project up. This could be due to the textures, lighting, bigger objects and more. Houdini is loading textures at 5% of network capacity and renders (3-5% CPU utilization) during the loading process.

Applying textures to objects: Add a UV texture node from the tab menu and connect it to the last node of your model. Then add a primitive sop to the UV texture. This node converts each polygon into a separate primitive. Under the primitive parameters go to the attributes tab and upload the .rat file. Create a decal node in the SHOP network now. This node applies texture to a model. Import the .rat file as your material and copy this parameter in the decal node’s parameters section. Then go to the OGL Tab and paste copied reference parameter value. Lastly, drag the decal material to the model.

Materials Editor: In the material gallery, Houdini includes a variety of pre-made materials. You may assign and customise materials from the gallery using the material palette. On the material palette, Houdini contains a number of handy built-in materials. Using the Principled material or other built-in materials, you may get almost any realistic look, potentially with layering. You may also create your own shader.

Mapping Materials: Normal and bump maps give the impression of more surface detail by adjusting normals at render time without actually producing new geometry. This makes them speedier and consumes less memory. Displacement maps create genuine new geometry throughout the rendering process. The renderer subdivides the current geometry and moves it based on the texture values.

Material Modifiers: Using VOPs, you create a material (a mixture of surface and displacement shaders that controls the displayed appearance of objects) in Houdini. shaders in Houdini may be built using a variety of shading VOPs. The high-level Principled shader in the shaders category of the Tab menu offers everything you need to recreate 99 percent of the looks you may require.

Material Types:
- Bitmap: A bitmap (also known as a raster graphic) is a computer image made up of a series of dots. Each dot corresponds to an individual pixel on a display when seen at 100%. Each dot in a conventional bitmap picture may be given a distinct colour. Together, these dots can be used to represent any type of rectangular picture.

- Procedural: Houdini is an extremely sophisticated 3D software tool for creating procedural materials for movies and games. It is more well-known in the film industry, but it is increasingly being integrated into the game production pipeline. Procedural modeling is often applied when multiple specialised tools are required.

Rendering
Scene rendering:
- Rendering controls: uses a camera to define the viewpoint from which to render, lights to illuminate the scene, and a render node to indicate the renderer and render parameters to be used You can also do preview renderings using the current view, a headlight, and the default render parameters.

- Rendering options: Mantra is the advanced renderer that comes with Houdini. It’s a multi-paradigm renderer that supports scanline, raytracing, and physically-based rendering.

- Output size and aspect ratio: If the output image’s aspect ratio (resolution width divided by height) does not match the aspect ratio of the camera aperture (controlled by attributes on the camera). When switching between cameras, this enables a conventional renderer to perform anything decent. To match the image, you should increase the aperture of your camera.

- Safeframe: The safeframe (display option) should fit the aspect ratio, for example 1024 x 576.

- File type: The file I saved my project to is “.hipnc”. The file contains colour and colour map information as well as the size of the picture.
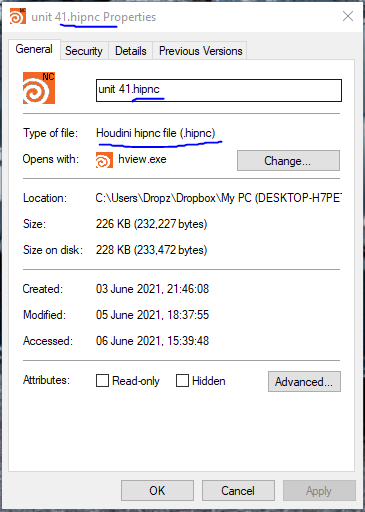
- File size: My project file size is 228 KB.

Image resolution:
- TV: TVs have a variety of resolutions, it could be anywhere from full HD (1920 x 1080) to 8k (7680 × 4320).

- Film: A medium-format film image can record an equivalent resolution of roughly 83 million pixels in the case of a 60 × 60 mm frame, and 125 million pixels in the case of a 60 × 90 mm frame, based on the above pixel density.
- Web: The standard web image resolution is 72 PPI (also known as “screen resolution”). The bigger the resolution the longer it will take to render.

- Desktop: The desktop resolution should be 1024×768 and a ratio of 4:3.
- Image formats: JPEG (.jpg), PNG (.png), GIF (.gif) and Bitmap (.bmp) are the most popular exporting image formats.
- Compression: is the process of reducing the size of a graphics file in bytes without impacting the image’s quality. More photos can be saved in a given amount of storage space because to the smaller file size.

Industry Practice
Reflect on finished product (compared with original intentions):
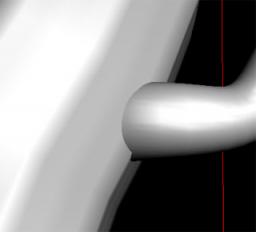
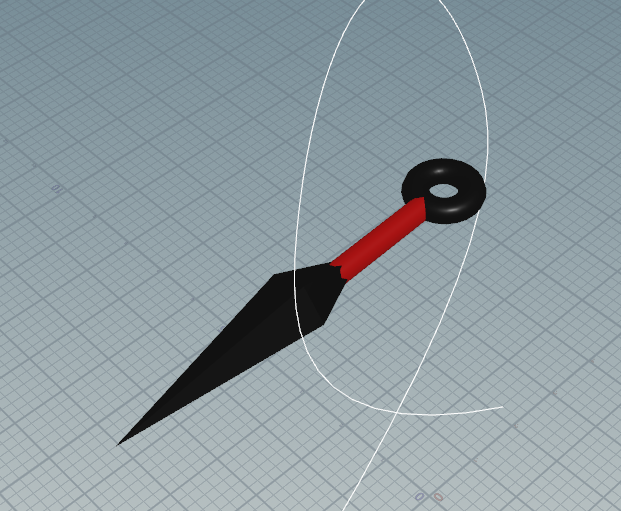
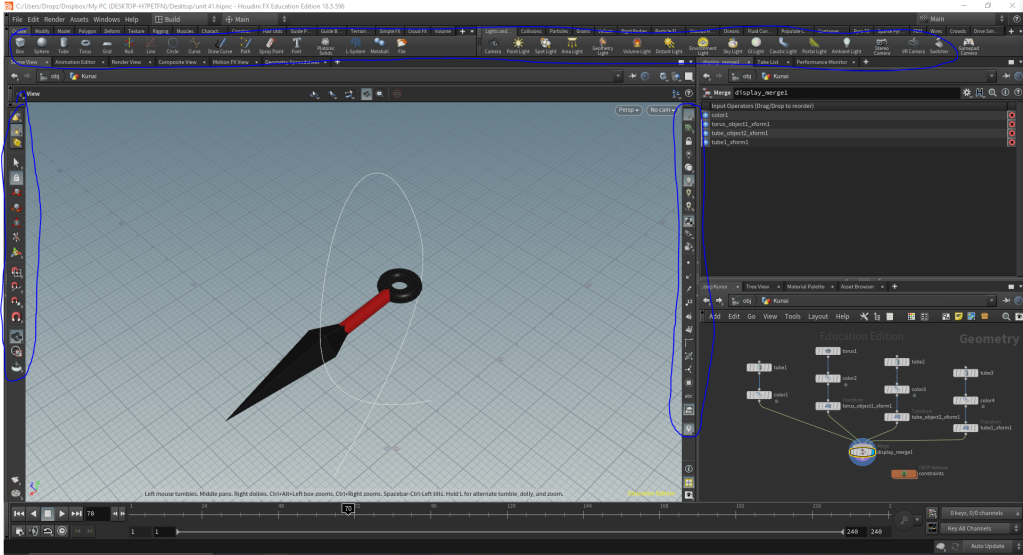
I’m pleased with my final product as it looks like an actual Kunai. However, if I had one negative comment about it is that on the handle I wanted to make it look like cloth was wrapped around it (like I originally planned). I tried to do that by messing around in the texture tab, but it was useless just like the videos on YouTube. Because Houdini 18.5 is pretty new so there aren’t a lot of tutorials with the new version of Houdini.

Furthermore, I wanted to create a human hand that threw the kunai in the air and caught it. However, I only found out later how hard it was to make a human hand. So I gave up on that after a few attempts. Instead, the kunai chucks itself upwards and does a flip before it lands on the floor. I’m still pretty happy with my animation on the kunai. Every object fitted well when I attached them together and the colours which I picked looked good in my opinion. As a kunai can be seen as a weapon, so I used red to represent blood and danger. And black represents stealth, because a kunai is small and deadly.
- Fitness for purpose: The purpose of my Kunai is to implement it into a video game, as fighting video games are very popular . So people would look for kunai’s or any weapons that look good and potentially buy it for their game. The games will target teenagers which will without a doubt buy the game, therefore I’ll make money out of this and popularity for my project. For example, my kunai could possibly be used in mortal combat or Naruto game.

- Technical Qualities: There are some occasions where you need to have some knowledge of Houdini in order to make a Kunai like mine. As at first I struggled a lot, didn’t even know how to control the camera. Over time you learn by searching the areas you struggle in. For example, if I didn’t search “how to make a path”, I would of not known how to make an animation for my kunai. And that’s only one simple example. https://www.youtube.com/watch?v=z4PRTzKr5Vc
- Aesthetic Qualities: My kunai looks really good in my opinion, if someone would guess what my project was without telling them, they’ll easily say kunai. As it is very similar to a real kunai.


Production Skills:
- Ideas Generation: Most of my ideas were taken from Naruto and Japanese culture. Because kunai’s were founded in Japan and Naruto (anime) is well known for using Japanese weapons throughout the anime series (like a kunai). I’ve taken a little bit of the styling and looks from Naruto as my kunai design.

- Modelling Specifications: I wanted my kunai to look deadly but at the same time not to grab attention easily, because that’s the whole point of a kunai. Therefore, I chose to make the figure of the kunai sharp, but small. There aren’t any patterns so that it wouldn’t grab any attention, it’s clean and slick. Lastly, I wanted to create a hand which throws the kunai in the air, but I couldn’t find a tutorial on how make a hand.
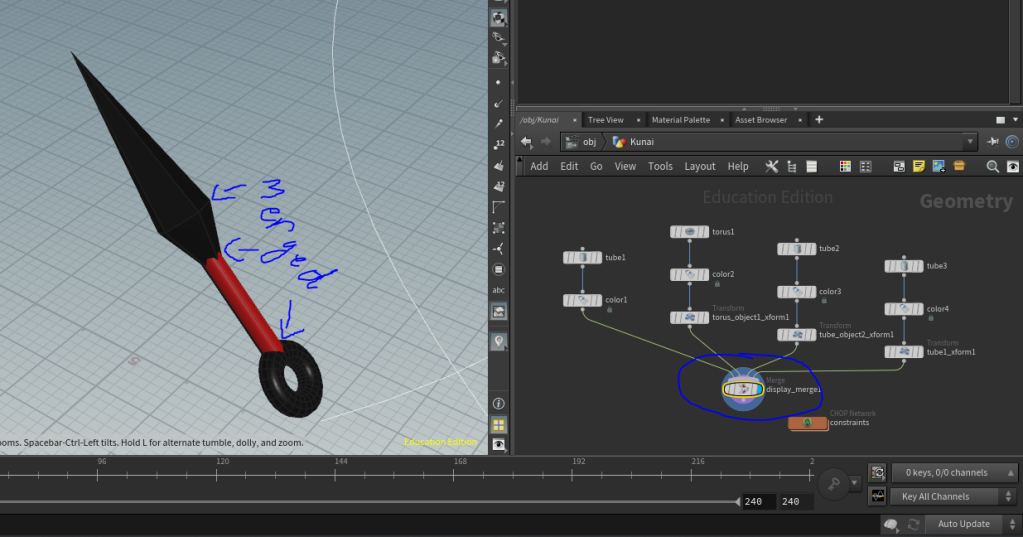
- Workflow and time management: It took me about 2 days to finish my kunai project, as I’m relatively new to Houdini. I started by picking the objects I needed to make a kunai, after I messed about with the dimensions (scaling) of the objects. After I was happy with the size of the objects , I put them together (combine tool) to see how it would look. Took an hour break, then I modified the objects a bit more to my liking until I was satisfied with them. After, I put them together once again (combine tool). And I was pleased with the result. The next day I decided to colour the objects. Made the handle bar red, which makes it look deadly, and made the rest of the kunai black. The colour adds like a matte finish to it, so it glows when there is light shining on it. Obviously I had to add the colour node in order to colour my objects and then I had to connect them together. The next day I decided to mess with the animation of the kunai, it took me like 3 hours to finish the animation, its looks ok. Nothing special about it, it was hard to find videos and tutorials of individuals using the animation tool for Houdini 18.5. Therefore, I couldn’t do anything wow with the animations. The animation part would be something that I would like to improve on in the future.

- Technical Competence: If there wasn’t any tutorials that I could follow or if I didn’t have friends that knew how to use Houdini then I would of struggled a lot on Houdini (animation part), as making the kunai wasn’t as difficult. The steps you to do in order to animate your object is very long and confusing, the only easy part was to place the points and move them about. Also, using and connecting the nodes was pretty simple too.
- Teamwork: I had no team for this project, I had to do this individually which I enjoyed to an extent. Because the project was based of my ideas, so there wasn’t any problems or complains. However, I did get some help from my friends in order to complete this project.

Conclusion:
For using Houdini for the first time I think I did pretty well. I’m proud of my final outcome, as I put effort into this project, so I would of been disappointed if my project would of turned out rubbish. The parts I think I did well on was using the tools (in the task bar). Because they were laid out well and had simple headings over each section. For example adding objects was simple (create tab) and then moving and rotating (selector and handle controls) the shapes about. It was also easy to align the objects together because of coordinates, so then you can combine them together. Furthermore, adding and connecting geometry’s and nodes was simple. But I struggled in finding the right nodes for the right job. The part I struggled the most on was creating an animation for my kunai. I didn’t know what nodes to add and how to set them in order for the kunai to be animated. If there was one thing which I would do different if I was to do this assignment again is to mess about with more of the options and tools in Houdini, as I haven’t used all the tools and features that are available in Houdini. Also, make another object which throws the kunai in the air.
Below you will see all the tools and features I’ve used for my kunai:
